The PanelOne LCD display and control panel was originally designed for RAMPS1.4, and that is still the most sensible way to use it as it uses two 2x5 IDC cables that are readily available. The PanelOne circuit board is designed to work with 3.3V and 5V electronics and this weekend I tested it with Sanguinololu (effectively going full circle back to the original Panelolu - just a lot easier to put together and use!)
This works fine, although you do need to be careful to plug the pins in correctly:
The correct pins for Sanguinololu are:
Wire number PanelOne Sanguinololu
Aux2
1 5V 5V
2 GND GND
3 EN B Rx1
4 EN A Tx1
5 LCD DB7 A4
6 LCD RS PWM
7 LCD DB6 A3
8 LCD E SDA
9 LCD DB5 A2
10 LCD DB4 A1
Aux3
1 Not Connected
2 Not Connected
3 CS A0
4 CLK SCK
5 DO MOSI
6 DI MISO
7 EN SW SCL
8 VCC 5V
9 Not Connected
10 Not Connected
This blog post has a good image of the location of each pin on the Sanguinololu, re-posted below:
The IDC cables are numbered with wire 1 being the red coloured wire.
This will work out the box with the T3P3 version of Marlin by enabling #SDSUPPORT and #ULTIMAKERCONTROLLER in configuration.h
The process followed can be adapted to use the PanelOne on any electronics that runs Marlin and has enough free pins. Do let me know if you get it working on another board!
This is the archive blog for Think3dPrint3d, please see Duet3d.com for up-to-date information
Showing posts with label Panelolu. Show all posts
Monday, 20 October 2014
Friday, 25 April 2014
Using OpenSCAD to design a basic LCD enclosure
Regular readers will be aware I am a big fan of using scripted CAD, specifically OpenSCAD, as a design tool. I have gone into my reasoning before, which I won't repeat now. This is a further worked example showing the steps I took to design a case for a basic LCD+Click encoder controller for a 3d printer. This posts will try not to repeat too much ground covered in my previous OpenSCAD "How To": the OpenSCAD manual will help following along.
As always this is Open Source Hardware so the OpenSCAD source and supporting control knob file is shared on GitHub.
The PanelOne is a simple back board for a 20x4 character LCD with a encoder, a SD card board and brightness and contrast pots. I will go into the rationale and design of it in another post.
First step is to take measurements of the dimensions of the electronics - these can be taken from the CAD files if you have them:
Depending on how complex a case you are making, this step can be very simple or very complex. For a great example of how complex a circuit model model can be, check out UrielGuy's model of the Sanguinololu electronics:
The case will be a simple design with back and front halves, along with a knob for the click encoder. It will be held together with M3 screws. A mounting method will be discussed in a later post.
The difference() function used in the code above subtracts a cube that is "shell_width" - "clearance" from the overall front or back shell. It then subtracts the LCD_assembly and the case holes. The following two pictures (with elements made transparent/hidden) helps to illustrate the process.
The great thing with rapid prototyping is the ability to quickly test out designs and make improvements. The first rough print had a couple of issues:
Overall the following issues were noted:
//IDC headers, use the clearance required for the plug
//these are much bigger on z than the actual headers for clearance
idc_y_x=16; //not all will be within case
idc_y_y=37.9;
idc_y_z=6.39+2.5;
idc1_offset_x=128.4;
idc1_offset_y=18.1;
idc1_offset_z=1.61;
For models I use often or that go through many iterations where I want to quickly change between different parts it makes sense to simplify the selection of what part of the model to display. At the top of the scad file I have:
This then determines what is rendered using a list of if statements used because, annoyingly, OpenSCAD does not appear to support a "switch" statement.
///////////////////////////////////////////////////////////////////////////////////////
// front
if (side==1)
{
front();
}
// back
else if(side==-1)
{
back();
}
//Printing plate
else if(side==2)
{
translate([shell_width,pl_y*2+shell_width*4,shell_top+shell_width])
rotate([180,0,0])
front();
translate([shell_width,shell_width,shell_width])
back();
translate([pl_y*0.5,pl_y*1.5+shell_width*2,shell_width])
knob_assembly(click_encoder_knob_dia/2);
}
//Electronics
else if(side==-2)
{
LCD_assembly();
}
//assembly
else
{
back();
front();
LCD_assembly();
translate([click_encoder_offset_x,click_encoder_offset_y,wall_width+ click_encoder_shaft_y+click_encoder_z-2])
knob_assembly(click_encoder_knob_dia/2);
}
///////////////////////////////////////////////////////////////////////////////////////
Thus changing one number allows you pick the render you want:
As always this is Open Source Hardware so the OpenSCAD source and supporting control knob file is shared on GitHub.
The electronics to encase
The PanelOne is a simple back board for a 20x4 character LCD with a encoder, a SD card board and brightness and contrast pots. I will go into the rationale and design of it in another post.
The aim for the case is to be quick and easy to print and use the the minimum of additional screws and other fixings.
Step 1 - Measurements
First step is to take measurements of the dimensions of the electronics - these can be taken from the CAD files if you have them:
This shows using the dimension function in KiCAD, although you can read the co-ordinates directly. The other, and my preferred, option is to take direct measurements:
This allows for the effect of the assembly processes to be taken into account easily.
Step 2 - Model the Electronics
Depending on how complex a case you are making, this step can be very simple or very complex. For a great example of how complex a circuit model model can be, check out UrielGuy's model of the Sanguinololu electronics:
In this case I am going to keep it simple.
Start by assigning the measurements to variables - you will thank yourself many times over as you come to reuse or modify these.:
clearance=0.8;
wall_width=1.6; //minimum wall width //should be a multiple of your extruded dia
layer_height=0.2;
//LCD screen
lcd_scrn_x=99;
lcd_scrn_y=40.5;
lcd_scrn_z=9.4;
lcd_board_x=99;
lcd_board_y=61;
lcd_board_z=1.6; //does not include metal tabs on base
lcd_hole_d=3.4;
lcd_hole_offset=(lcd_hole_d/2)+1;
//board edge to center of first connector hole
lcd_connect_x=10.2;
lcd_connect_y=58.4;
//PanelOne circuit board
pl_x=136;
pl_y=lcd_board_y;
pl_z=4; //excluding click Encoder and SD card and cable headers, but including the soldered bottoms of the through hole connectors
pl_mounting_hole_dia=3.4;
pl_mounting_hole_x=133.6;
pl_mounting_hole1_y=3.4; //only bothering with 2 holes at this point
pl_mounting_hole2_y=58.4;
//rotary encoder
click_encoder_x=13.2;
click_encoder_y=12.6;
click_encoder_z=6;
click_encoder_shaft_dia=6.9+clearance;
click_encoder_shaft_h=12.2;
click_encoder_knob_dia=24;
click_encoder_offset_x=112.2;
click_encoder_offset_y=30.8;
//contrast and brightness holes
cb_dia=4; //hole diameter for adjustment screw
cb_h=15;
con_offset_x=107.2;
con_offset_y=16.1;
con_offset_z=pl_z;
bri_offset_x=117.1;
bri_offset_y=16.0;
bri_offset_z=con_offset_z;
//headers
//lcd connection header
lcd_h_x=(16*2.54)+2.54;
lcd_h_y=2.54;
lcd_h_z=3; //this is the gap between the circuit board caused by the plastic spaces on 2.54mm headers
lcd_h_offset_x=lcd_connect_x;
lcd_h_offset_y=lcd_connect_y;
lcd_h_offset_z=pl_z;
//IDC headers, use the clearance required for the plug
//these are much bigger on z than the actual headers for clearance
idc_h_x=16; //not all will be within case
idc_h_y=14+clearance;
idc_h_z=pl_z+click_encoder_z;
idc1_offset_x=128.4;
idc1_offset_y=20.5-clearance/2;
idc1_offset_z=-wall_width;
idc2_offset_x=idc1_offset_x;
idc2_offset_y=39.6-clearance/2;
idc2_offset_z=idc1_offset_z;
//SD card slot
SD_slot_x=24.5+clearance; //wider for clearance
SD_slot_y=29.5;
SD_slot_z=4;
SD_slot_offset_x=100.5-clearance/2;
SD_slot_offset_y=39.5;
SD_slot_offset_z=pl_z;
//case variables
shell_split_z = pl_z+SD_slot_z; //board split in the top of the slots
shell_width=wall_width+clearance;
shell_top = pl_z+click_encoder_z+2;
Then I write a number of small functions to draw up the components:
module LCD_assembly() {
translate([0,0,lcd_h_offset_z+lcd_h_z])
lcd();
pl_board();
//lcd connection header
color("black")
translate([lcd_h_offset_x,lcd_h_offset_y,lcd_h_offset_z])
cube([lcd_h_x,lcd_h_y,lcd_h_z]);
}
//LCD screen
module lcd() {
difference(){
union(){
color("OliveDrab")
translate([0,0,0])
cube([lcd_board_x,lcd_board_y,lcd_board_z]);
color("DarkSlateGray")
translate([(lcd_board_x-lcd_scrn_x)/2,(lcd_board_y-lcd_scrn_y)/2,lcd_board_z])
cube([lcd_scrn_x,lcd_scrn_y,lcd_scrn_z]);
}
for(i=[lcd_hole_offset,lcd_board_x-lcd_hole_offset]){
for(j=[lcd_hole_offset,lcd_board_y-lcd_hole_offset]){
translate([i,j,lcd_board_z])
cylinder(r=lcd_hole_d/2,h=lcd_board_z+3,$fn=12,center=true);
}
}
}
}
//PanelOne circuit board simplified
module pl_board() {
difference(){
union(){
color("lightgreen")cube([pl_x,pl_y,pl_z]);
//click encoder
color("darkgrey"){
translate([click_encoder_offset_x,click_encoder_offset_y,pl_z+(click_encoder_z)/2])
cube([click_encoder_x,click_encoder_y,click_encoder_z],center=true);
translate([click_encoder_offset_x,click_encoder_offset_y,pl_z+click_encoder_z+(click_encoder_shaft_h)/2])
cylinder(r=click_encoder_shaft_dia/2,h=click_encoder_shaft_h,center=true);
//contrast and brightness pots
translate([con_offset_x,con_offset_y,con_offset_z+cb_h/2])
cylinder(r=cb_dia/2,h=cb_h,center=true);
translate([bri_offset_x,bri_offset_y,bri_offset_z+cb_h/2])
cylinder(r=cb_dia/2,h=cb_h,center=true);
}
}
translate([-0.1,-0.1,-0.1]){
cube([93,45,pl_z+2]);
cube([6,lcd_board_y+1,pl_z+2]);
}
//mounting holes
translate([pl_mounting_hole_x,pl_mounting_hole1_y,(pl_z+3)/2])
cylinder(r=pl_mounting_hole_dia/2,h=pl_z+3,center=true);
translate([pl_mounting_hole_x,pl_mounting_hole2_y,(pl_z+3)/2])
cylinder(r=pl_mounting_hole_dia/2,h=pl_z+3,center=true);
}
//SD board
color("lightblue")
translate([SD_slot_offset_x,SD_slot_offset_y,SD_slot_offset_z])
cube([SD_slot_x,SD_slot_y,SD_slot_z]);
//IDC headers
color("darkgrey"){
translate([idc1_offset_x,idc1_offset_y,idc1_offset_z])
cube([idc_h_x,idc_h_y,idc_h_z]);
translate([idc2_offset_x,idc2_offset_y,idc2_offset_z])
cube([idc_h_x,idc_h_y,idc_h_z]);
}
}
It is a good idea to split down the design into logical blocks - these can be reused. The LCD module is re-used from the Panelolu2 case design for example.
I used the color function within OpenSCAD to make this render easier to view:
Step 3 - The Case
The case will be a simple design with back and front halves, along with a knob for the click encoder. It will be held together with M3 screws. A mounting method will be discussed in a later post.
The back and front halves are very simple to code, since the hard work has already been done in defining the electronics which is used to "cut" the holes required in the case.
module case_screw_holes(nut_trap=false,z_height=0, dia=lcd_hole_d) {
for(i=[lcd_hole_offset,pl_mounting_hole_x])
for(j=[lcd_hole_offset,pl_mounting_hole2_y]){
if (nut_trap) {
translate([i,j,z_height])
cylinder(r=dia/2, h=shell_width*2, $fn=fn);
translate([i,j,z_height])
cylinder(r=m3_nut_diameter_bigger/2+layer_height*2, h=shell_width, $fn=6);
} else {
translate([i,j,z_height])
cylinder(r=dia/2,h=shell_width*2+30,$fn=12,center=true);
}
}
}
module back() {
difference(){
translate([-shell_width,-shell_width,-shell_width])
cube([pl_x+shell_width*2,pl_y+shell_width*2,shell_split_z+shell_width]);
translate([-clearance,-clearance,-clearance])
cube([pl_x+clearance*2,pl_y+clearance*2,shell_split_z+clearance+0.01]);
LCD_assembly();
case_screw_holes(false,-shell_width);
}
//support pillar
translate([6,6,0])
difference(){
cube([10,10,pl_z+lcd_h_z]);
translate([wall_width,wall_width,0])
cube([10-wall_width*2,10-wall_width*2,pl_z+lcd_h_z+0.1]);
}
}
module front() {
difference(){
translate([-shell_width,-shell_width,shell_split_z])
cube([pl_w+shell_width*2,pl_y+shell_width*2,shell_top-shell_split_z+shell_width]);
translate([-clearance,-clearance,shell_split_z-0.01])
cube([pl_w+clearance*2,pl_y+clearance*2,shell_top-shell_split_z+clearance]);
LCD_assembly();
case_screw_holes(false,shell_top+shell_width);
}
}
Step 4 - Tweak
The great thing with rapid prototyping is the ability to quickly test out designs and make improvements. The first rough print had a couple of issues:
support for the LCD needed
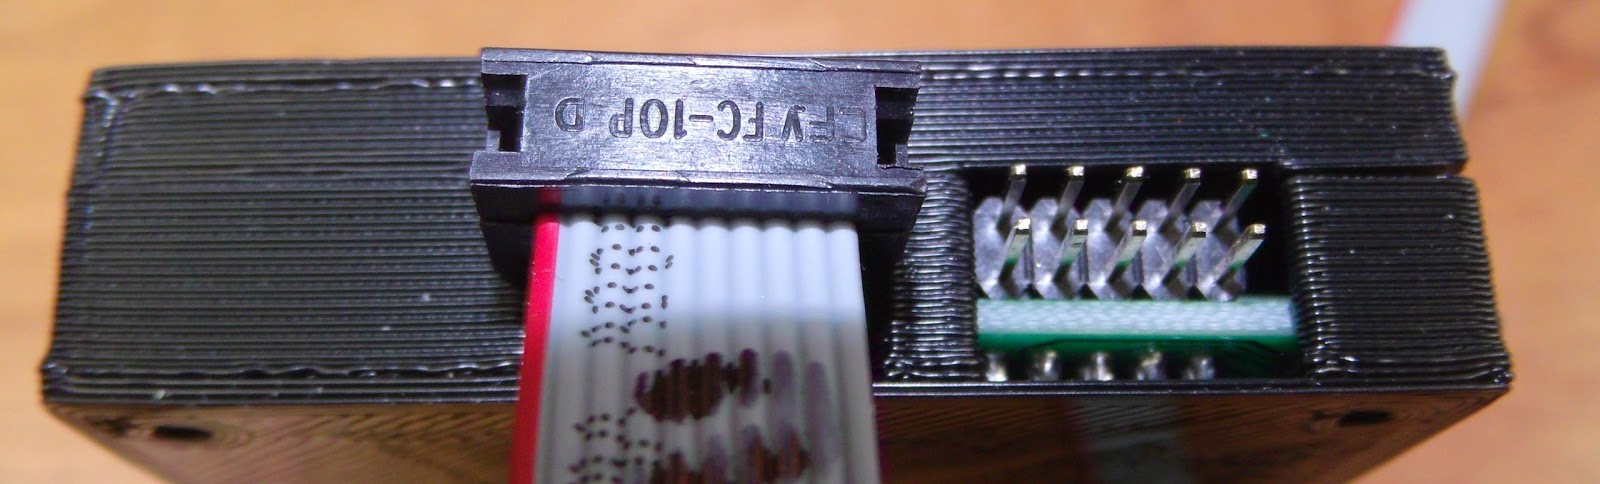
clearance for the IDC connectors needs moving up
Overall the following issues were noted:
- The holes for the IDC plugs for the cables need to be wider and higher up in the case, easiest to replace with a single cutout.
- The box spacer used as a support in the back interfered with the back of the LCD
- To hold the board more rigidly some supports are required - the corners are the easiest place for these.
Fixes:
Change the IDC header dimensions, only one "header" needed in the model now:
//these are much bigger on z than the actual headers for clearance
idc_y_x=16; //not all will be within case
idc_y_y=37.9;
idc_y_z=6.39+2.5;
idc1_offset_x=128.4;
idc1_offset_y=18.1;
idc1_offset_z=1.61;
Remove the box spacer and add supports to the front and back:
module back() {
side=8; //for the supports
difference(){
union(){
difference(){
translate([-shell_width,-shell_width,-shell_width])
cube([pl_x+shell_width*2,pl_y+shell_width*2,shell_split_z+shell_width]);
translate([-clearance,-clearance,-clearance])
cube([pl_x+clearance*2,pl_y+clearance*2,shell_split_z+clearance+0.01]);
LCD_assembly();
}
//corner supports
for(i=[-wall_width,pl_y-side+wall_width]){
translate([-wall_width,i,-shell_width])
cube([side,side,8.75]);
translate([pl_x-side+wall_width,i,-shell_width])
cube([side,side,4.35]);
}
//additional support
translate([lcd_board_x-side,-wall_width,-shell_width])
cube([side,side/2,8.75]);
}
case_screw_holes(false,0);
}
}
module front() {
side=8; //for the supports
difference(){
union(){
difference(){
translate([-shell_width,-shell_width,shell_split_z])
cube([pl_x+shell_width*2,pl_y+shell_width*2,shell_top-shell_split_z +shell_width]);
translate([-clearance,-clearance,shell_split_z-0.01])
cube([pl_x+clearance*2,pl_y+clearance*2,shell_top-shell_split_z +clearance]);
LCD_assembly();
}
//corner supports
for(i=[-wall_width,pl_x-side+wall_width])
for(j=[-wall_width,pl_y-side+wall_width]){
translate([i,j,shell_split_z])
cube([side,side,shell_top-shell_split_z+wall_width]);
}
//additional supports
for(i=[-wall_width,pl_y-side/2+wall_width]){
translate([lcd_board_x-side,i,shell_split_z])
cube([side,side/2,shell_top-shell_split_z+wall_width]);
}
}
case_screw_holes(false,shell_top+shell_width);
}
}
The final case:
Step 5 - Optional Extras
For models I use often or that go through many iterations where I want to quickly change between different parts it makes sense to simplify the selection of what part of the model to display. At the top of the scad file I have:
///////////////////////////////////////////////////////////
//front, back or Assembly
///////////////////////////////////////////////////////////
side=2; //1 = front, -1 = back 2=printing layout -2 Electronics module 0=assembly model
///////////////////////////////////////////////////////////
//front, back or Assembly
///////////////////////////////////////////////////////////
side=2; //1 = front, -1 = back 2=printing layout -2 Electronics module 0=assembly model
///////////////////////////////////////////////////////////
This then determines what is rendered using a list of if statements used because, annoyingly, OpenSCAD does not appear to support a "switch" statement.
///////////////////////////////////////////////////////////////////////////////////////
// front
if (side==1)
{
front();
}
// back
else if(side==-1)
{
back();
}
//Printing plate
else if(side==2)
{
translate([shell_width,pl_y*2+shell_width*4,shell_top+shell_width])
rotate([180,0,0])
front();
translate([shell_width,shell_width,shell_width])
back();
translate([pl_y*0.5,pl_y*1.5+shell_width*2,shell_width])
knob_assembly(click_encoder_knob_dia/2);
}
//Electronics
else if(side==-2)
{
LCD_assembly();
}
//assembly
else
{
back();
front();
LCD_assembly();
translate([click_encoder_offset_x,click_encoder_offset_y,wall_width+ click_encoder_shaft_y+click_encoder_z-2])
knob_assembly(click_encoder_knob_dia/2);
}
///////////////////////////////////////////////////////////////////////////////////////
Thus changing one number allows you pick the render you want:
That's all for now - I hope to get a blog post out about the PanelOne itself soon.
Friday, 15 February 2013
Panelolu2
Panelolu2 - An I2C control solution for Sanguinololu, Melzi and more
The original Panelolu was designed to provide a simple user interface for a 3d printer controlled by a Sanguinololu and similar electronics - enabled by the Ultipanel code within the Marlin firmware. By connecting to the right pinouts it also works with Printrboard and RAMPS.
I have developed a new version which uses an I2C port expander to drive the LCD screen and adds a piezo buzzer and indication LEDs. This version uses less pins, making it compatible with the Melzi electronics and even leaves enough spare pins to drive a couple more outputs (such as an additional extractor fan and stepper driver cooling fan).
In the photo above the grid covers the piezo buzzer and the H,E and F LEDs indicate that the Heated bed, Extruder and Fan (or second extruder) are on. It would be relatively simple to change the firmware to have these LEDs turn on for another reason. The R for reset and the encoder wheel are the same as in the original Panelolu although I have made the encoder wheel about 1/3 smaller to fit better.
Circuit board
The Panelolu2 design simplifies the assembly by mounting all components on one circuit board that can be soldered directly to an LCD screen. The standard way to connect it to the screen is with a single row of 2.54mm headers as shown below. This row of headers could be replaced by wires (ribbon cable would be best) - enabling a variey of case designs, such as Printbit's Panelolu Box for Mendel Max.
This simplification also extends to the wiring which is now a 2x6 IDC plug on both ends of a ribbon cable. The circuit uses a combination of through hole and surface mount components; the other side of the prototype circuit board is shown below. The brightness and contrast pots are now on the back of the board and can be adjusted through the rear of the case.
I have tidied up the Schematic: the components are the MCP23017 port expander, the SD card circuitry, buzzer, click encoder and LEDS.
Of course the whole project is Open Source Hardware and the eagle files are available on github.
Case design
As mentioned above, the circuit board and LCD allow for multiple case designs. I have made a simple case with a back leg allowing the Panelolu2 to sit on the bench alongside the printer.
The case design is all done in OpenSCAD with both .scad and .stl versions of the files, available on Thingiverse. One of the great things I have found about Thingiverse is it allows you to embed the Thingiviews of the STL files, so here are the front and back case views:
Front
Back
The OpenSCAD file also allows the back leg to be generated to support the case at your chosen angle. For the rotary encoder I adapted Miserybot's "Spinner Knob" design to make it about 1/3 smaller and a lot thinner - the .stl is on Thingiverse and I will upload the OpenSCAD code once it is cleaned up.
Adapter Boards
One of the aims of the Panelolu2 was to reduce the complexity involved in wiring it up. I have designed adapter boards to allow compatibility of the Panelolu2 with various electronics. The picture below shows the adapter board connected to a Sanguinololu.
Update added the Sanguinololu and Melzi adapter schematics:
As can be seen from the schematic the two mosfets for driving additional light loads such as fans are on the PWM and A3 pins on the Sanguinololu. These pins can be accessed as Arduino digital pins 4 for the pin labelled PWM and 28 for the pin labelled A3. In Marlin firmware to turn on the fan connected to Transistor 1:
M42 S255 P4
And transistor 2
M42 S255 P28
In overview the picture below shows the inputs and outputs from the prototype Melzi adapter board.
The Schematic for the Melzi adapter board is:
The same logic as described the solder jumper operations on the Sanguinololu adapter board applies to the Melzi board. For the two additional outputs they are on pin A4 and A3 which are digital pins 27 and 28 respectively.In Marlin firmware to turn on the fan connected to Transistor 1:
M42 S255 P28
And transistor 2
M42 S255 P27
For basic operation the ISP and expansion header plug into the Melzi and the Panelolu plugs into its 2x6 connector. If desired FETs can be mounted to switch a 12V supply, for example to drive external fans.
As an alternative to the adapter board, standard female housings with crimp connectors could be used. I intend to design boards for Printrboard and RAMPS in the near future.
(update: done, see this blog post)
I2C encoder option
Instead of linking the encoder and switch directly to pins on the Sanguinololu, Melzi or other electronics, the hardware has the option to run the encoder and switch over I2C. This would free up a couple more pins but the option is not yet supported by firmware. The Panelolu2 circuit board and adapter boards have solder jumpers, shown below on the back of the Melzi adapter board
Currently the firmware does not support routing the encoder signals over I2C so by default these jumpers will be set for normal operation.
Firmware
The Panelolu2 only runs on Marlin firmware at the moment. Excellent work was done by Daid in the Marlin code to split the LCD screen hardware from the user interface. This made it straightforward to implement the Panelolu2 code. As mentioned in previous posts LiquidTWI2 by Lincomatic is required; download it from github, rename the directory from "LiquidTWI2-master" to "LiquidTWI2 and put it in the
sub-folder.
UPDATE: - This step is no longer required in the latest version of LiquidTWI2 (1.2.4) the library will work out the box with no configuration changes required.
By default the Panelolu2 is disabled in LiquidTWI2, after saving the directory, edit LiquidTWI2.h to remove the comments on line 10:
// #define PANELOLU2 //only possible....
To
#define PANELOLU2 //only possible....
Continue following the instructions from here:
Then download the T3P3 fork of Marlin, make the changes you need to configuration.h to suit your printer and ensure :
#define EEPROM_SETTINGS
and
#define PANELOLU2
are uncommented within configuration.h then upload as normal. The compiled Marlin is ~100k, a very similar size to Marlin compiled for the original Panelolu, so the electronics board will need enough space (a 1284P is fine, a 644P does not have enough space).
Summary
Update, added this section to summarise the process of getting the Panelolu2 working Sanguinololu.
Availability
As always the hardware is open source so the design files are available on Github: https://github.com/T3P3/Panelolu2.
Update: Now available on our webstore and on eMakershop and eBay
The original Panelolu was designed to provide a simple user interface for a 3d printer controlled by a Sanguinololu and similar electronics - enabled by the Ultipanel code within the Marlin firmware. By connecting to the right pinouts it also works with Printrboard and RAMPS.
I have developed a new version which uses an I2C port expander to drive the LCD screen and adds a piezo buzzer and indication LEDs. This version uses less pins, making it compatible with the Melzi electronics and even leaves enough spare pins to drive a couple more outputs (such as an additional extractor fan and stepper driver cooling fan).
In the photo above the grid covers the piezo buzzer and the H,E and F LEDs indicate that the Heated bed, Extruder and Fan (or second extruder) are on. It would be relatively simple to change the firmware to have these LEDs turn on for another reason. The R for reset and the encoder wheel are the same as in the original Panelolu although I have made the encoder wheel about 1/3 smaller to fit better.
Circuit board
The Panelolu2 design simplifies the assembly by mounting all components on one circuit board that can be soldered directly to an LCD screen. The standard way to connect it to the screen is with a single row of 2.54mm headers as shown below. This row of headers could be replaced by wires (ribbon cable would be best) - enabling a variey of case designs, such as Printbit's Panelolu Box for Mendel Max.
This simplification also extends to the wiring which is now a 2x6 IDC plug on both ends of a ribbon cable. The circuit uses a combination of through hole and surface mount components; the other side of the prototype circuit board is shown below. The brightness and contrast pots are now on the back of the board and can be adjusted through the rear of the case.
I have tidied up the Schematic: the components are the MCP23017 port expander, the SD card circuitry, buzzer, click encoder and LEDS.
Of course the whole project is Open Source Hardware and the eagle files are available on github.
Case design
As mentioned above, the circuit board and LCD allow for multiple case designs. I have made a simple case with a back leg allowing the Panelolu2 to sit on the bench alongside the printer.
The case design is all done in OpenSCAD with both .scad and .stl versions of the files, available on Thingiverse. One of the great things I have found about Thingiverse is it allows you to embed the Thingiviews of the STL files, so here are the front and back case views:
Front
Back
The OpenSCAD file also allows the back leg to be generated to support the case at your chosen angle. For the rotary encoder I adapted Miserybot's "Spinner Knob" design to make it about 1/3 smaller and a lot thinner - the .stl is on Thingiverse and I will upload the OpenSCAD code once it is cleaned up.
Adapter Boards
One of the aims of the Panelolu2 was to reduce the complexity involved in wiring it up. I have designed adapter boards to allow compatibility of the Panelolu2 with various electronics. The picture below shows the adapter board connected to a Sanguinololu.
Update added the Sanguinololu and Melzi adapter schematics:
As can be seen from the schematic the two mosfets for driving additional light loads such as fans are on the PWM and A3 pins on the Sanguinololu. These pins can be accessed as Arduino digital pins 4 for the pin labelled PWM and 28 for the pin labelled A3. In Marlin firmware to turn on the fan connected to Transistor 1:
M42 S255 P4
And transistor 2
M42 S255 P28
In overview the picture below shows the inputs and outputs from the prototype Melzi adapter board.
The Schematic for the Melzi adapter board is:
The same logic as described the solder jumper operations on the Sanguinololu adapter board applies to the Melzi board. For the two additional outputs they are on pin A4 and A3 which are digital pins 27 and 28 respectively.In Marlin firmware to turn on the fan connected to Transistor 1:
M42 S255 P28
And transistor 2
M42 S255 P27
For basic operation the ISP and expansion header plug into the Melzi and the Panelolu plugs into its 2x6 connector. If desired FETs can be mounted to switch a 12V supply, for example to drive external fans.
As an alternative to the adapter board, standard female housings with crimp connectors could be used. I intend to design boards for Printrboard and RAMPS in the near future.
(update: done, see this blog post)
I2C encoder option
Instead of linking the encoder and switch directly to pins on the Sanguinololu, Melzi or other electronics, the hardware has the option to run the encoder and switch over I2C. This would free up a couple more pins but the option is not yet supported by firmware. The Panelolu2 circuit board and adapter boards have solder jumpers, shown below on the back of the Melzi adapter board
Currently the firmware does not support routing the encoder signals over I2C so by default these jumpers will be set for normal operation.
Firmware
The Panelolu2 only runs on Marlin firmware at the moment. Excellent work was done by Daid in the Marlin code to split the LCD screen hardware from the user interface. This made it straightforward to implement the Panelolu2 code. As mentioned in previous posts LiquidTWI2 by Lincomatic is required; download it from github, rename the directory from "LiquidTWI2-master" to "LiquidTWI2 and put it in the
arduno-0023/libraries/
sub-folder.
UPDATE: - This step is no longer required in the latest version of LiquidTWI2 (1.2.4) the library will work out the box with no configuration changes required.
By default the Panelolu2 is disabled in LiquidTWI2, after saving the directory, edit LiquidTWI2.h to remove the comments on line 10:
// #define PANELOLU2 //only possible....
To
#define PANELOLU2 //only possible....
Continue following the instructions from here:
Then download the T3P3 fork of Marlin, make the changes you need to configuration.h to suit your printer and ensure :
#define EEPROM_SETTINGS
and
#define PANELOLU2
are uncommented within configuration.h then upload as normal. The compiled Marlin is ~100k, a very similar size to Marlin compiled for the original Panelolu, so the electronics board will need enough space (a 1284P is fine, a 644P does not have enough space).
Summary
Update, added this section to summarise the process of getting the Panelolu2 working Sanguinololu.
- If you are not already using it get the standard version of Arduino-0023 from the Arduino website, note that the T3P3 version of Marlin has not been tested with Arduino 1.0 or higher.
- If you are not already using a Sanguinololu with 1284P then update the avrdude.conf file in the standard Arduino-0023 to include a definition of the atmega 1284p, I have used this one for a year now. Be sure to put it in arduino-0023\hardware\tools\avr\etc\ and rename or overwrite the old one. More detail in my first blog post.
- Get T3P3 Marlin from github.
- If you are not already using a Sanguinololu with 1284P add the "Marlin\ArduinoAddons\Arduino_0.xx\Sanguino" directory to "arduino-0023\Hardware\" directory. This provides the Sanguino extensions required for Sanguinol and Melzi.
- Get LiquidTWI2 as mentioned above, note that configuration changes are no longer required in the latest version of LiquidTWI2.
- Modify the configuration.h of the Marlin to fit your printer setup (setting like controller board, axis dimensions, thermistors, etc). Its best to copy these from the configuration.h of your existing firmware. Update: This blog post should help.
- Confirm Marlin compiles and uploads with //#define PANELOLU2 still commented out in configuration.h.
- Then uncomment #define PANELOLU2 , along with #define EEPROM_SETTINGS and #define EEPROM_CHITCHAT and confirm it compiles and uploads. Note that with the #define PANELOLU2 uncommented, you must have the Panelolu2 connected or Marlin will hang and not finish initialising.
- Check the printer operation and calibration to ensure you have edited the Marlin configuration.h properly.
Availability
As always the hardware is open source so the design files are available on Github: https://github.com/T3P3/Panelolu2.
Update: Now available on our webstore and on eMakershop and eBay
Labels:
click encoder,
I2C,
LCD Screen,
MCP23017,
Panelolu,
Panelolu2,
SD Card
Subscribe to:
Posts (Atom)


