Showing posts with label Open Hardware. Show all posts

Friday, 15 July 2016

DuetWifi Thermal Testing

The DuetWifi is our new advanced 3d printing electronics board based on the Duet 0.8.5 but completely redesigned with David Crocker (DC42 on the reprap forums). We are currently running a pre-order which is due to end 17 Jul 2016 with the first boards delivered in the first week of August. We have also had a batch of pre-production beta boards made which are with beta testers right now. We put one of the boards through thermal testing by Andy Hingston (who was part of the Duet 0.6 design team). This blog post will deal with the thermal testing, I have future posts planned to detail the hardware design of the DuetWifi.

The main concern for heat generation on the board are the stepper driver chips. The TMC2660s are rated to 2.8A RMS, however we have limited them in firmware to 2A for now. What our testing has shown is that the TMCs drivers, coupled with the board design mean these drivers will run cool in most "normal" desktop size 3d printers (~1A motor current) and have the capacity to scale for significantly larger printers comfortably (~2A motor current).

In order to do a comprehensive test we decided to test the TMCs with 1A, 1.5A and 2A (RMS) of stepper motor current in three conditions:

  1. With the motors held in a "half step": in this condition there is 100% of the current flowing through half of the stepper driver with 0% through the other half.
  2. With the motors held in a "full step": in this condition there is 1/Sqrt(2) of the current ~70.7% of the maximum current flowing through both halves of the driver.
  3. In a normal microstepping mode with a step frequency of 8000 steps/min at 16 microsteps, interpolated by the drivers to 256 microsteps.
In all cases we allowed the temperature to stabilise for 20 mins from an ambient temperature of ~25C

The results: in summary the drivers and heatsinking design on the board have performed really well. At 2A RMS in the "half step" condition (the worst case) we saw the temperature rise to 87.7C (a 62.7C rise from ambient). In the actual use case of the normal stepping at 2A it was a rise to 71C (a 46C rise from ambient). All these tests were performed powering X,Y and Z drivers on the board at the same time so that the Y driver had hot drivers on either side of it. We expected it to get the hottest but actually Z was generally the hottest by about a degree indicating the importance of the PCB to dissipate the heat.

The thermal camera output is below; click on the pictures for larger images.

1A Half Step hold
DuetWifi Thermal Test 1A Half Step Hold - 48.7C

1.5A Half Step hold
DuetWifi Thermal Test 1.5A Half Step Hold - 62.1C

2A Half Step hold
DuetWifi Thermal Test 2A Half Step Hold - 87.7C - Front View
This view of the back of the board shows just how effective the heatsinking on the back layer is.
DuetWifi Thermal Test 2A Half Step Hold - 71.0C - Back View


1A Full Step hold
DuetWifi Thermal Test 1A Full Step Hold - 51.0C

1.5A Full Step hold
DuetWifi Thermal Test 1.5A Full Step Hold - 62.1C

2A Full Step hold
DuetWifi Thermal Test 2A Full Step Hold - 79.8C


1A Normal Stepping
DuetWifi Thermal Test 1A Normal Stepping - 41.8C

1.5A Normal Stepping

DuetWifi Thermal Test 1.5A Normal Stepping - 55.5C

2A Normal Stepping

DuetWifi Thermal Test 2A Normal Stepping - 71.0C

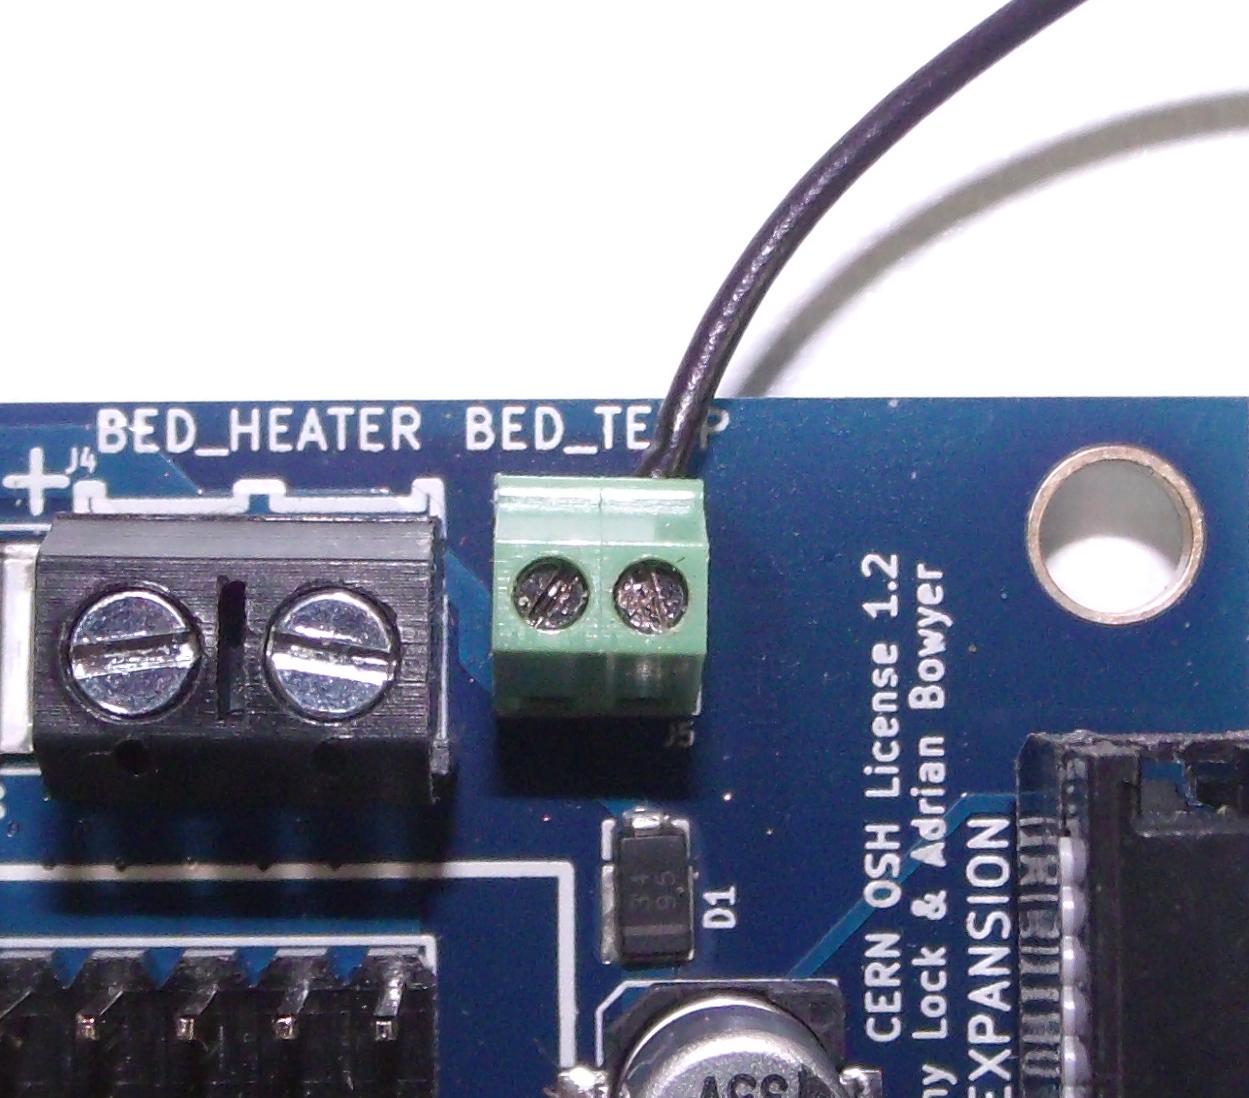
The other area of interest as far as power dissipation on the bard was the heated bed MOSFET and associated power traces. We wanted to carry at least 15A so I increased the width of the trace and doubled it up (both front and back). With 15A on constantly we saw a stable temperature of 88.5C at the hottest point.

DuetWifi Thermal Test 15A Bed MOSFET - 85.3C on Front power (-) trace, 81.9C on MOSFET

DuetWifi Thermal Test 15A Bed MOSFET - 88.5C on Back power (+) trace

Sunday, 25 October 2015

Mini Kossel: Think3dPrint3d Release 3


Think3dPrint3d Mini Kossel Release 3

We have been selling our version of the Mini Kossel delta 3d printer for 15 months now. As is the nature of RepRap projects it has evolved along the way. We have marked these tweaks and upgrades and improvements as different versions of our kit and we are now ready to release our 3rd version - the Think3dPrint3d Mini Kossel Release 3. Though it builds on our other upgrades it is by far the most significant revision yet.

More detail is set out below but in summary we are switching to 32 Bit Duet Electronics, 20x20 extrusions, IR probing for true autocalibration, as well as some other more minor improvements to the usability or ease of assembly of the printer. Of these the single biggest change is using the Duet electronics with David Crocker's improved RepRap Firmware which allows for segmentation free delta printing and easy autocalibration.


Since David implemented delta support in the RepRap Firmware we have had many enquiries about buying the kits with the Duet (and some customers chose to help out as unofficial beta testers). It has taken until now for us to bring everything together into a kit form, including thdetailed documentation, to ensure builders will get the same great experience assembling this version as the previous ones.


Improvements in detail


Electronics


The Duet is a high powered 32 bit ARM-Cortex-M3-based 3D printing electronics solution which runs the powerful RepRap Firmware; more on this and the web interface later. With our kits in mind we designed a new 5-channel version of the Duet board with all the connectors, switches and power LEDs along one side. This allows for the electronics to be neatly mounted in the base of the printer with the USB, Ethernet, SD card, switches and power LEDs still fully accessible:


Duet 0.85 mounted in the Mini Kossel base showing accessibility

The new Duet V0.8.5 also has 2 extruder channels and so allows an easy upgrade path to dual extruders without an extension board, like the RAMPS in previous versions of the Mini Kossel, but unlike previous 4-channel Duets.


RepRap Firmware and Web Interface


David Crocker's RepRap Firmware takes advantage of the ARM chip's 32-bit processing power to provide true segmentation-free delta movement for improved smoothness and accuracy. Unlike most 8-bit firmware like Marlin, RepRap Firmware is precompiled and there is not normally any reason to modify or recompile it. The firmware is easy to configure with all the settings controlled through Gcodes in simple text configuration files. David has documented the setup of the configuration files in some detail on the RepRap wiki, for Cartesian printers, Delta printers and CoreXY printers.

The Ethernet support allows direct connection to a network or ethernet port on a laptop, or connection via Wifi. The web interface by Christian Hammacher is simple yet powerful and can be run on any device that is on the same network as the printer.


RepRapFirmware Web Interface running on Duet 0.8.5

I have taken to using my phone to control my printers:


RepRap Firmware Web interface on an Android Phone

20x20mm extrusions


These provide increased frame stiffness and allow the use of T-slot nuts which can simply be dropped into the extrusion channels when required, making assembly much easier.

Mini Kossel part way through assembly showing 20x20 extrusions


Frame assembly is greatly simplified with T-slot nuts

Differential IR Probe


David Crocker also developed a really great mini IR probe which, when combined with the functions within RepRap firmware allows for quick and accurate printer setup and calibration.


Hot end assembly showing DC42's differential IR probe mounted next to the E3D V6 heater block.

Below is a video showing the probe in action:


Other Improvements


To further simplify the printer wiring we designed an effector wiring breakout PCB
AppA-R13-hotend-PCB.JPG
Effector breakout PCB
Breakout PCB connected to hotend, IR probe, fans and wiring loom

The extruder and E3D V6 hot-end are preassembled and tested. 

AppA-R07-extruder.JPG
Assembled and tested extruder
AppA-R14-V6.JPG
Assembled E3D V6

While the majority of our customers have had no issues since we switched from the JHead to the V6 in Release 2, a few have struggled with the V6 assembly. As this kit is designed for hassle free assembly we want to eliminate all the potential issues. The V6 is assembled, heated to 290C and the nozzle tightened in accordance with E3D's recommendations.

We have included a top mounted spool holder for some time now, along with other tweaks and improvements suggested by our customers. For a full specification of the kit see our website.

Open Source Hardware.


As with everything we do the changes to the printed parts are available on our Github.

More to come!


We are also finalising the design and kit contents, and working on the documentation for a much larger Kossel, based to a large extent on David Crocker's supersized Kossel. It will optionally have a E3D Cyclops/Chimera dual extrusion hotend, 24V power and a massive 300mm diameter by ~480mm high print area. If you are interested in getting your hands on a Beta Kit then feel free to email us! Update 17 November 2015 - all 10 beta test slots have now been taken.

Sunday, 12 April 2015

Duex4 V0.2a - Minor Updates

I have made a slight revision to the Duex4 v0.2 4 extruder expansion board for the Duet 3d printing electronics, the revised design is the Duex4 v0.2aThe revision is to add analogue GND to the expansion board input header connected by either a fly lead (Duet v0.6) or directly (later Duet versions).

Analogue GND should have been used from the beginning but I left it out by mistake. This omission lead to noisier temperature readings on the expansion board than on the Duet (as documented, with a fix, by David Crocker). This was annoying but I did not see a drop in performance as the thermal mass of the hotends was enough to cancel out any temperature swings commanded by this noise. None the less it needed to be fixed, but in a way that allowed the Duex4s to still be compatible with the Duet 0.6 expansion header.

In the schematic you can see that pin 39 of the expansion header how connects to a jumper, and then on to VSSA (analogue GND) within the expansion board.


AD 12 used to be on pin 39 however it will be used later Duet versions for the probe input on a header on the main duet board.


This allows for analogue GND to be fed in via pin 2 of the header on a Duet v0.6 or for a jumper to be used on later duet boards.The pictures below show the Duet v0.6 and Duex4 v0.2a with the analogue GND fly lead connected to the heated bed thermistor GND.


This fly lead can also be connected to the hotend thermistor ground screw terminal:

or VSSA Pin 38 on the 40 pin motor loom header:


All V0.2a Duex4s will be supplied with the necessary fly-lead for hooking up the analogue GND as described above.

The updated KiCAD source files are available on our Github, licensed under the CERN OHL v1.2

Tuesday, 28 October 2014

Mendel90 with e3d v6 hotend

The next generation (version 2) of the Lasercut Mendel90 is a work in progress. Currently we are planning on having from 1 to 5 bowden extruders to allow for a single extruder printer as a starting point that is then easily upgradable to as many extruders as required. I will post more information as I finalise the design, for now I wanted to share a X carriage, hotend mount and modified print cooling fan to fit an E3D V6 bowden hotend.

e3d V6 1.75mm bowden hotend mounted on a Lasercut Mendel90, view from below without the print cooling fan
Hotend mount

The hotend mount is designed to accommodate Nophead's ribbon cable connection PCB. 


The e3d v6 fits snugly into a groove mount.


After assembly:


Modified X Carriage

This X_Carriage is a further development on the one made for the Kraken hotend, in fact it was designed to allow the V6 and Kraken to be swapped out without dismounting the carriage. Unfortunately the Kraken is too large for that however at least only one carriage design is required for both.


With the V6 from above


and the Kraken from below


Modified Print Cooling Fan Duct

The V6 is too big for the original fan duct, also this method of mounting places the print tip almost in the center of the carriage. I redesigned the fan duct to take this into account:


I am interested to see how well this design operates "in the wild", I think it may be time to move to bowden in most applcations as a stepping stone to multi material and multi colour printing.

As always Think3dPrint3d designs are open hardware. The design files are available on github and as a Youmagine design.

Follow this blog or @Think3dPrint3d to be alerted to further developments! 


Monday, 20 October 2014

PanelOne on Sanguinololu

The PanelOne LCD display and control panel was originally designed for RAMPS1.4, and that is still the most sensible way to use it as it uses two 2x5 IDC cables that are readily available. The PanelOne circuit board is designed to work with 3.3V and 5V electronics and this weekend I tested it with Sanguinololu (effectively going full circle back to the original Panelolu - just a lot easier to put together and use!)


This works fine, although you do need to be careful to plug the pins in correctly:


The correct pins for Sanguinololu are:

Wire number    PanelOne             Sanguinololu
                         Aux2
1                       5V                         5V
2                       GND                     GND
3                       EN B                     Rx1
4                       EN A                     Tx1
5                       LCD DB7              A4
6                       LCD RS                PWM
7                       LCD DB6              A3
8                       LCD E                  SDA
9                       LCD DB5              A2
10                     LCD DB4              A1
                         Aux3
1 Not Connected
2 Not Connected
3                       CS                        A0
4                       CLK                      SCK
5                       DO                        MOSI
6                       DI                          MISO
7                       EN SW                  SCL
8                       VCC                      5V
9 Not Connected
10 Not Connected

This blog post has a good image of the location of each pin on the Sanguinololu, re-posted below:

The IDC cables are numbered with wire 1 being the red coloured wire.

This will work out the box with the T3P3 version of Marlin by enabling #SDSUPPORT and #ULTIMAKERCONTROLLER in configuration.h

The process followed can be adapted to use the PanelOne on any electronics that runs Marlin and has enough free pins. Do let me know if you get it working on another board!


Friday, 22 August 2014

Arduino based IDC cable tester

We use IDC terminated ribbon cables for the PanelOne LCD controller that we use in our Mini Kossel 3D Printer kits. Its a slow process to test these cables by confirming that the LCD, SD card, encoder etc all work so I looked for an IDC ribbon cable tester. I found a few online but they ran to ridiculous prices (~£250+) so decided to make one using an Arduino Mega and some strip board:


As can be seen there has been no time wasted on making it look pretty, in fact it is probably the ugliest circuit I have made, ever, however it works and tests cables!

Stripboard IDC cable tester circuit - hot glue used to protect questionable soldering

The circuit schematic includes the connections for a PanelOne as I had a prototype board that was no longer being used, however any 20x4 LCD screen and push switch would work.


It uses the internal pullup resistors on the arduino pins so no external components are required other than the connecting wires and headers.

I wrote a simple Arduino sketch to check the cable and display the results. It finds open and crossed wires:

Arduino Circuit Tester - Start Screen

Arduino Circuit Tester - Open Circuit

Arduino Circuit Tester - Crossed wires (plug on backwards)

Arduino Circuit Tester - Good cable
The next step will be to make a circuit tester for the 50 way Duet-Duex4 expansion header cables however that would require 100 pins which is more than is available on the Mega.... I2C port expanders here we come! Also I think a PCB will be required as 100 wires on stripboard would take far too long.

As usual its all open hardware and software - available on the Think3dPrint3d Github.

I hope someone finds this useful and I would be interested to see if anyone else tries this!


Monday, 18 August 2014

PanelOne LCD screen for 3.3V and 5V electronics

Following on from this post on using the PanelOne LCD screen with the Duet at 3.3V, this post shows the modified design for the PanelOne that uses a 3.3V LCD.

While I managed to get a specific LCD work with both 3.3V and 5V, it was an edge case. It was not transferable to other LCD manufacturer's displays and it may have shortened the display's life. To that end I changed the specifications to use a 3.3V LCD. This display is actually a 5V display with a voltage inverter and divider on board that provides -2V to VO.


PanelOne circuit board view from the back with 3.3V LCD


Close up of the -2V circuit on LCD

This -2V means that with 3.3V supplied, the voltage drop is 5V which the display driver chip needs to run the LCD pixels.

For reference here is the Schematic again, now on version 2.1, with the -2V on board annotated:


So the contrast pot on the PanelOne circuit board is acting as a variable resistor setting VO between 0 and -2V, and hence the contrast between "off" and "on" pixels on the LCD.

For a purely 3.3V use there would be no requirement for the 5V-3.3V LDO and the 4050 level shifter for the SD card. However, I want to be able to use this on both 3.3V and 5V logic with minimal changes. For the display to work with 5V we have two options. The first is to use a 5V display rather than 3.3V, thus requiring only 1 PanelOne circuit board design. Alternatively we could use the same 3.3V display and disable the -2V on VO. The simplest way to do this is to remove the resistor R6:


Close up of the -2V circuit disable with R6 removed

I have left it soldered on at one end so it's easy to switch back and forth. Obviously a switch would be even better (cue email to LCD manufacturer to consider updating their design).

This design is now proven on both 5V (RAMPS) and 3.3V (Duet etc) electronics:

PanelOne 2.1 with RAMPS

PanelOne 2.1 with Duet

The connection to the Duet is still made with single pin connectors and the RepRap Firmware does not yet support an LCD screen although the community (and me!) are working on it.

As always our designs are open hardware (CERN OHL 1.2) - the latest KiCAD files are available on our Github. In addition the updated case is also shared in STL and OpenSCAD on github.

We will be using the PanelOne v 2.1 circuit board in our Kossel Mini kits once our current stocks of 5V-only PanelOne boards are used up. In addition we have listed variations on the webstore, where you can choose the 5V only version or the 3.3V version (which you can adapt to 5V using the resistor de-soldering method outlined above).