Showing posts with label Mini Kossel. Show all posts

Sunday, 25 October 2015

Mini Kossel: Think3dPrint3d Release 3


Think3dPrint3d Mini Kossel Release 3

We have been selling our version of the Mini Kossel delta 3d printer for 15 months now. As is the nature of RepRap projects it has evolved along the way. We have marked these tweaks and upgrades and improvements as different versions of our kit and we are now ready to release our 3rd version - the Think3dPrint3d Mini Kossel Release 3. Though it builds on our other upgrades it is by far the most significant revision yet.

More detail is set out below but in summary we are switching to 32 Bit Duet Electronics, 20x20 extrusions, IR probing for true autocalibration, as well as some other more minor improvements to the usability or ease of assembly of the printer. Of these the single biggest change is using the Duet electronics with David Crocker's improved RepRap Firmware which allows for segmentation free delta printing and easy autocalibration.


Since David implemented delta support in the RepRap Firmware we have had many enquiries about buying the kits with the Duet (and some customers chose to help out as unofficial beta testers). It has taken until now for us to bring everything together into a kit form, including thdetailed documentation, to ensure builders will get the same great experience assembling this version as the previous ones.


Improvements in detail


Electronics


The Duet is a high powered 32 bit ARM-Cortex-M3-based 3D printing electronics solution which runs the powerful RepRap Firmware; more on this and the web interface later. With our kits in mind we designed a new 5-channel version of the Duet board with all the connectors, switches and power LEDs along one side. This allows for the electronics to be neatly mounted in the base of the printer with the USB, Ethernet, SD card, switches and power LEDs still fully accessible:


Duet 0.85 mounted in the Mini Kossel base showing accessibility

The new Duet V0.8.5 also has 2 extruder channels and so allows an easy upgrade path to dual extruders without an extension board, like the RAMPS in previous versions of the Mini Kossel, but unlike previous 4-channel Duets.


RepRap Firmware and Web Interface


David Crocker's RepRap Firmware takes advantage of the ARM chip's 32-bit processing power to provide true segmentation-free delta movement for improved smoothness and accuracy. Unlike most 8-bit firmware like Marlin, RepRap Firmware is precompiled and there is not normally any reason to modify or recompile it. The firmware is easy to configure with all the settings controlled through Gcodes in simple text configuration files. David has documented the setup of the configuration files in some detail on the RepRap wiki, for Cartesian printers, Delta printers and CoreXY printers.

The Ethernet support allows direct connection to a network or ethernet port on a laptop, or connection via Wifi. The web interface by Christian Hammacher is simple yet powerful and can be run on any device that is on the same network as the printer.


RepRapFirmware Web Interface running on Duet 0.8.5

I have taken to using my phone to control my printers:


RepRap Firmware Web interface on an Android Phone

20x20mm extrusions


These provide increased frame stiffness and allow the use of T-slot nuts which can simply be dropped into the extrusion channels when required, making assembly much easier.

Mini Kossel part way through assembly showing 20x20 extrusions


Frame assembly is greatly simplified with T-slot nuts

Differential IR Probe


David Crocker also developed a really great mini IR probe which, when combined with the functions within RepRap firmware allows for quick and accurate printer setup and calibration.


Hot end assembly showing DC42's differential IR probe mounted next to the E3D V6 heater block.

Below is a video showing the probe in action:


Other Improvements


To further simplify the printer wiring we designed an effector wiring breakout PCB
AppA-R13-hotend-PCB.JPG
Effector breakout PCB
Breakout PCB connected to hotend, IR probe, fans and wiring loom

The extruder and E3D V6 hot-end are preassembled and tested. 

AppA-R07-extruder.JPG
Assembled and tested extruder
AppA-R14-V6.JPG
Assembled E3D V6

While the majority of our customers have had no issues since we switched from the JHead to the V6 in Release 2, a few have struggled with the V6 assembly. As this kit is designed for hassle free assembly we want to eliminate all the potential issues. The V6 is assembled, heated to 290C and the nozzle tightened in accordance with E3D's recommendations.

We have included a top mounted spool holder for some time now, along with other tweaks and improvements suggested by our customers. For a full specification of the kit see our website.

Open Source Hardware.


As with everything we do the changes to the printed parts are available on our Github.

More to come!


We are also finalising the design and kit contents, and working on the documentation for a much larger Kossel, based to a large extent on David Crocker's supersized Kossel. It will optionally have a E3D Cyclops/Chimera dual extrusion hotend, 24V power and a massive 300mm diameter by ~480mm high print area. If you are interested in getting your hands on a Beta Kit then feel free to email us! Update 17 November 2015 - all 10 beta test slots have now been taken.

Wednesday, 24 September 2014

More Mini Kossel Updates

After nearly 4 months of supplying Mini Kossel kits we have had a lot of fantastic feedback from all the makers who have put the kits together. This is the third post on additions, changes and improvements (the first one is here, and the heated bed one here).


Simple second extruder fan mount


We have had a number of requests for a solution to allow a second, PWM controlled fan to blow on the part being printed, so I designed this modified J_head extruder mount:


This mounts on the end effector plate in the same way as the original one, with the exception that it is rotated by 60 degrees (one hole) to allow the z-probe to clear the second fan:


To minimise the air blowing on the heated bed from the existing, always-on, fan cooling the thermal break on the J-head, I added a strip of aluminium tape to the bottom of the always-on fan mount. The tape can withstand the hot-end temperature so I sealed all the way to the hot-end heater block insulation.


As the fan mount has to be rotated 60 degrees to allow the probe to clear the fan, one of the probe mount screws needs a nut adding:


The second fan is prepared with a male connector pin so it can be plugged and unplugged at the same point as the rest of the end effector wiring loom. In the long run the end effector wiring loom may move to a 2x5 pin plug.


The screws self tap into the plastic of the mount.


The fan wiring follows the same route as the remainder of the end effector/hotend wiring loom, with a plug lined up with the existing plug:


It connects to the RAMPS via screw terminal D9, between the extruder and heated bed (not connected in the picture below), allowing for PWM control when Motherboard number 33 is selected within Marlin configuration.h.


No firmware changes should be required from the standard setup and the cooling settings within Slic3r and Cura will turn the fan on after a specified number of layers.

The source files for the updated hot-end fan mount are on Github. and its also a "thing" on Youmagine!

New PSU for Heated Bed


After an issue with sourcing reliable and economical high current laptop power supplies, James Clutterbuck suggested the Dell DA-2; a 12V 18A power supply:


This beast is capable of providing enough power for the whole printer and heated bed so from now on complete printer kits ordered with heated beds will be supplied with just this power supply. Unfortunately although the DA2 is supplied with what appears to be a 2x4-way Molex Minifit plug, the housing doesn't mate correctly with the standard Molex 2x4 Minifit socket, and so needs to be changed (part numbers below).


Roland designed a new face plate that accommodates the Molex socket along with a power switch and the USB plug.


The power supply cable is wired to both sides of the RAMPS plug:


The assembled faceplate installed:


The documentation will be updated shortly. The source files are available on our Kossel Mini Repository on Github (USB-power-8way-V2). If you want to source the parts for the upgrade, along with the printed plate, you need:

Dell DA-2 Power supply (12V 18A)
8 way connectors: Molex 39-01-2080 and 39-01-2081
16AWG crimp pins for molex 39-00-0078 and 39-00-0082.
Standard case rocker switch such as this one.


Marlin improvements


The Think3dPrint3d Kossel fork of the Marlin firmware is available on github and comes pre-configured as a good starting point for Marlin on a Mini Kossel. I have recently implemented a couple of improvements. Firstly David LapeÅ¡ pointed out this feature request/ bug fix for the main version of Marlin which allows for negative position numbers to be correctly displayed on the PanelOne screen:


The second change is to add 4 menu items for filament management. Within the "Prepare" menu you can now choose to prime or retract the filament by a small amount (default 3mm) as well as either load or unload the filament completely (default 560mm).


The default values can be changed within configuration.h, line 399 onwards:

#define EASY_LOAD
#define BOWDEN_LENGTH 560
#define LCD_PURGE_LENGTH 3
#define LCD_RETRACT_LENGTH 3
#define LCD_PURGE_FEEDRATE 200
#define LCD_RETRACT_FEEDRATE 600
#define LCD_LOAD_FEEDRATE 500

#define LCD_UNLOAD_FEEDRATE 500

You can also set the feed rate for each action (in mm/minute)

This based on Lajos's changes to Marlin for the Tantilus printer, I changed his implementation to make it work with the delta firmware and simplify the options a bit.

You can upgrade to these changes by downloading the Think3dPrint3d version of Marlin and uploading it. Make sure you copy across any changes you have made to configuration.h such as the Z height and delta radius after calibration.

Sleeker cable management


Mark Burton has added "Go Faster" stripes to his Kossel mini in the form of these extrusion insets, which nicely hide away the endstop cables.


4 of the strips fit in each extrusion tower. The scad and stl files are on github.


 Thanks to everyone who has sent feedback and design improvements!

Sunday, 31 August 2014

Slicing software printed support review - evaluating Slic3r, Cura and Meshmixer

Support material options for single extruder printers have come on significantly recently and I have run a series of test prints to evaluate three contenders:

Meshmixer, by Autodesk - adding support structures to meshes is a small subset of the processing it can do on stl files. (version 2.5)

Cura, by Ultimaker. A capable slicing program with super fast path generation. (version 14.07)

Slic3r, by Alessandro Ranellucci and others. The go-to slicing software for much of the reprap community with a great amount of configurability. (version 1.2.0 experimental)

This is not intended to be a tutorial on how to use these three programs as excellent tutorials already exist, I will simply expose the settings and processes I used for support generation.

I chose two models as test pieces: low poly Fennec Fox, uploaded to thingiverse by Physics_Dude. I scaled this model to 120% for the tests.


Printed as one piece it requires significant support to print properly.

Also the bonsai planter by createdbygordon


Which has some tricky internal overhangs when sliced without infill to make a pot.

Support generation

Meshmixer

The meshmixer support generation is semi automatic - it is automatically generated but I found it needed a bit of tweaking to fully support this model.

After importing the model into meshmixer, go to analyse, overhangs and select Ultimaker2 (Dizingof's settings) as the start point, then "Generate Support":

Meshmixer support automatic generation
The support is generated over all the area highlighted in red, you can modify how thick you want the columns and the interface points. I have gone for 2mm columns with 0.8mm interface points (where the support narrow just before touching the model).


Meshmixer support - starting from the fox's foot rather than the build surface.

One of the more annoying "features" is the autogeneration choosing to start a support pillar from a surface of the model (as shown in the picture above) rather than from the build surface.


Meshmixer support - long fragile support columns
Another issue I found were quite long support pillars that were too fragile to consistently support themselves. This is where you can add additional support pillars to shore them up as shown below.


Meshmixer support - adding additional support pillars
Clicking on the point you want the support to be on either the model or an existing support will drop a pillar down to the build surface (or you can click and drag for finer control). I found this was required for the taller support columns.


Meshmixer support automatic generation - made solid
Finally you click "convert to solid before exporting the model as an .stl. this can then be sliced without support with Slic3r or Cura as you like.

On the bonsai planter the issue of generating support that builds on the object rather than the build plate is even more pronounced:


Also it was difficult to manually add support columns that go down to the build plate - they insisted on snapping to the object instead. An issue with all the slicers: when using the solid object there is obviously no way to generate support inside for overhangs.


Slic3r

Slic3r's support generation settings I used are:


Slic3r support settings
The pillars pattern is relatively new and should provide a good compromise between strength of support and use of material. I did not see a noticeable difference in the support generated with "support bridges " checked or unchecked - probably because the foxes body and the overhangs on the bonsai planter have a slope to them.

The fox support looks like this in gcode visualisation:

Slic3r Support gcode - visualised in pronterface
The pillars are interconnected with lines - seemingly at random.

Cura

The basic setting allow you to select support that is only touching the build plate, this is a good feature as its often provides enough support and prevents the top of lower parts of the model getting messed up:


In expert settings you can tweak the support which allows you to put space between the support and the sides of the object - another good option to reduce the occasions that the support messes up parts of the print that do not need support.


Cura has built in gcode visualisation:


With the line option you get far less retracts than the other software a Dizingof mentions:


Although I have not had a print jam due to retractions using any of the support options.

Printed examples

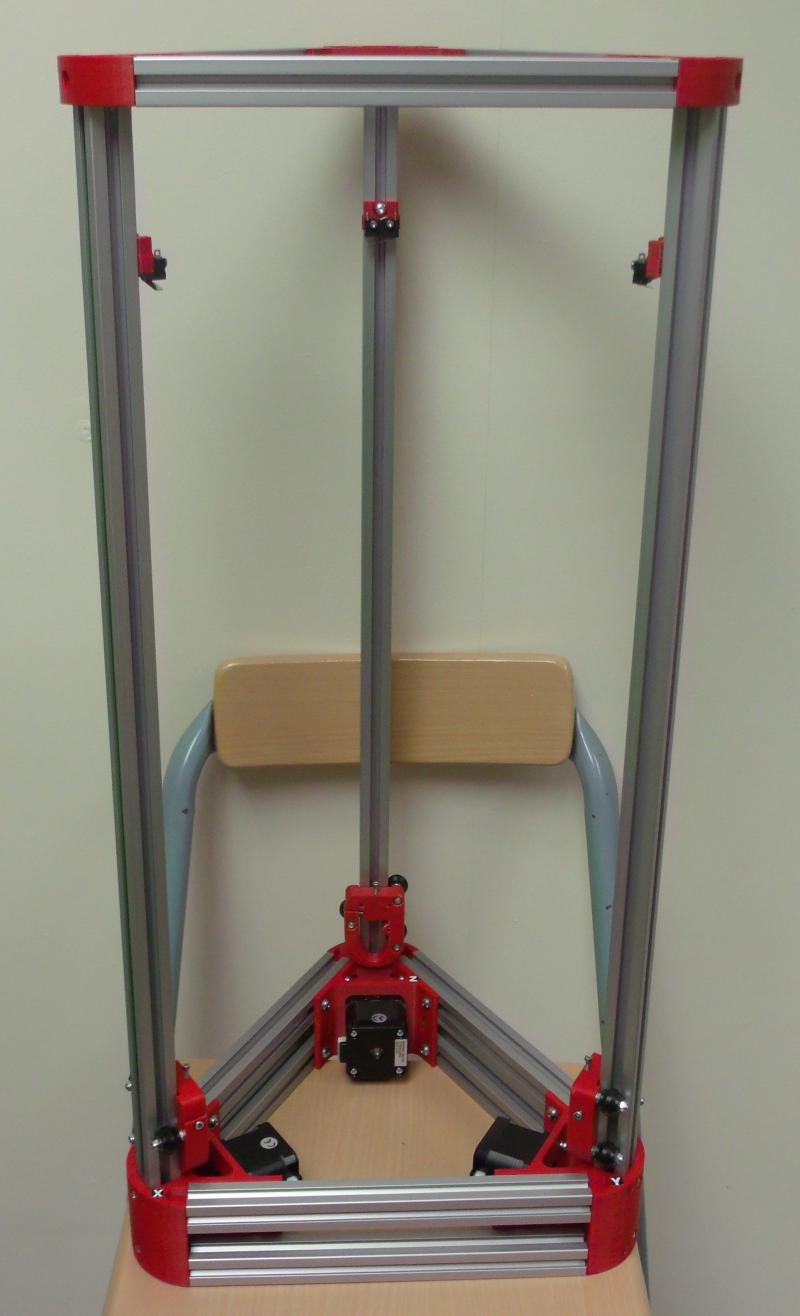
All these examples were printed on the Mini Kossel printer, in generic ABS at 0.2mm layer height.

Meshmixer


The support printed well (however the autogenerated support struts definitely needed the manually added additional bracing)


Meshmixer support of Fennec Fox


Meshmixer support in detail
The picture in detail shows the support columns narrowing to a nominal 0.8mm at the top.

I did not try the bonsai planter print with meshmaker support.


Slic3r


This support turned out to be much more intrusive on the model than meshmixer or cura


Slic3r support of Fennec Fox

Slic3r support in detail
The support itself consisted of columns with wispy bits between them - maybe there is no retraction with the support? Also note how the support is partially encasing the front legs.


With the bonsai planter the support generated by both Slic3r and Cura was only external to the object - even though the object was printed with no infill and thus might require 
support internally. This is rather an unusual case though so I am not surprised it was not generated. this issue is evident on the roots where they are bridging over the top as shown below:


Bonsai planter with no infill showing the perimeters failing to bridge properly
I tried to reduce this issue by using 6 perimeters which improved some areas but was not enough.

Cura

Cura's support is laid down thicker by default than Slicer but it nicely avoids the vertical parts of the object it is next to


Cura support of Fennec Fox


Cura support in detail - notice the support warping
Due to the long straight lines and printing in ABS the support warped quite a lot as shown in the photo, however it did not affect the print in any noticeable way.


Cura had the same issue with the internal unsupported areas of the bonsai planter that Slic3r did - in addition it showed quite a bit of stringing internally, I wonder if it does not retract for internal, no perimeter crossing, moves. While in general this is probably fine if there is no infill the inside should be treated in the same manner as the outside so this is an area for improvement.


Bonsai planter - internal stringing

Support removal

In all cases I removed the support by hand, assisted by a pair of small side cutters for finishing off. I spent no more than 5 minutes on each fox model so more support could be removed by further work, ie by filing/sanding.

Meshmixer

The meshmixer support was the easiest to remove from the fox model. Having only 0.8mm contact points as dots along with the lever arm of the printed pillar ment they broke off very close to the model but not always exactly at the interface - sometimes a couple of 0.8mm layers were left on the model


Meshmixer support removed

As can be seen the remaining support marks are quite obvious, however the support did a good job of ensuring the supported layers printed well.

Slic3r

The Slic3r support was variably easy to remove - the tail and head support came away in one piece with no effort, leaving an extremely clean finish:


Slic3r support removed - fox head very clean

Slic3r support removed - fox tail similarly clean
The fox body was a different story - here the support was tangled up with the top of the legs and it was difficult to remove the last few layers. 


Slic3r support removed - fox body with support remaining

Slic3r support removed - fox leg with support marks
As there was no gap between the support and the front legs there were support marks along the sides of the legs.

With the bonsai planter the support came away relatively easily - with similar issues where it unnecessarily touched the model walls. The supported surface in this case though was not that well supported and looked rough.

Slic3r support removed - bonsai planter with support marks

Cura

The cura support was almost as easy to remove as meshmixer, leaving noticeable lines that none the less looked better than the meshmixer spots.


Cura support removed - minor marks remaining

Cura support removed - lines visible on the tail
Cura proved to be the most consistent across the whole model and the support only touched the model where it was required.

For the Bonsai planter the support was similarly easy to remove and left minimal marks overall. It did a better job than Slic3r in supporting the model however it left one area unsupported that arguably should have been. This lead to the perimeters curling up and the white filament being discolored by the nozzle.

Cura support removed - discolouration due to unsupported area curling up


Summary

Meshmixer

This support was the most efficient in material use however it required the most manual tweaking to print properly. In addition the marks it left once removed were more noticeable than Cura and (sometimes) Slic3r. While the settings could probably be further modified to improve the performance this support type appears the most limited for future improvements.

Sic3r

The support's performance was variable - by far the best in some situations (fox's head and tale) however the worst to remove with the most obvious marks in other areas of the same model. This may be down to my chosen settings and with some more tweaking I may get better results. The most obvious general flaw is that it does not leave a big enough gap between the support and the unsupported areas of the model (like the foxes legs or the lower roots of the planter)

Cura

While some of the support left marks, overall it was the easiest to generate support which performed consistently well. Once again though slight tweaks could improve this further for specific models. 

Overall Cura wins my "no time to tweak - got to make it work now" award.

Last word

Over the last few years the support generation in Slic3r and Cura has improved a huge amount (no idea bout Meshmixer as I only just started using it). All three of these programs are under constant development and frequently get improved so this blog post is definitely not the last word! I would welcome other people's experience with the support functions and tweaks to make them work better in specific situations. I have also left out at least one commonly used (but not free/OSS) program in KISSlicer - one to evaluate in the future.