Fortunately, as the laser cutting process standardises the frame there are only a few steps to get up and running.
Software
The Mendel90 Lasercut is not tied to a specific set of software and there are many great software packages out there for preparing 3D models for printing, for controlling the printer itself, and even for the firmware that runs on the electronics. The software covered here is what we have tested the most and recommend. The generation of the 3D models to print is outside of the scope of this post; a good place to start is Thingiverse which has many free models to download.
Slicing software
Slic3r takes a 3D model file as input and generates the "G Code" that instructs the printer. It is free and open source software that is constantly being improved and is available in versions for Windows, Linux and Mac OSX. Using this example of a herringbone gear set, the 3D model in "stl" format looks like this:

Slic3r allows you to set how you want the object printed, for example, you should set the layer thickness, density of infill, speed etc.

It produces text based instructions that look like this (a small excerpt from a file):
....
G1 Z0.250 F7800.000
G1 X60.415 Y89.757
G1 F1800.000 E1.00000
G1 X100.085 Y67.787 F1260.000 E11.03416
G1 X100.585 Y67.567 E11.15503
G1 X101.105 Y67.397 E11.27608
....
The G Code is simply a list of instructions which the printer follows one by one. There are many codes - the list on the RepRap Wiki is pretty comprehensive, but to get started you don't need to know this in detail as Slic3r handles it all automatically.
We distribute a profile for Slic3r with the M90LC kit that allows you to get up and running quickly and the Slic3r manual is comprehensive.
Printer Control Software
The printer does not need a PC to run, as it can be controlled directly from the Panelolu2. However it is quicker and easier to control the printer with a PC for the initial calibration. To do this we use Pronterface which is part of Printrun. This is also available for Windows, Linux and Mac OSX.

Pronterface allows you to directly control the printer, move the axes, set the bed and extruder temperatures and load files to print. A nice feature is that it will render the G-code of a loaded file so it can be examined before printing. The screen capture below shows a slice through the herringbone gear G code

Firmware
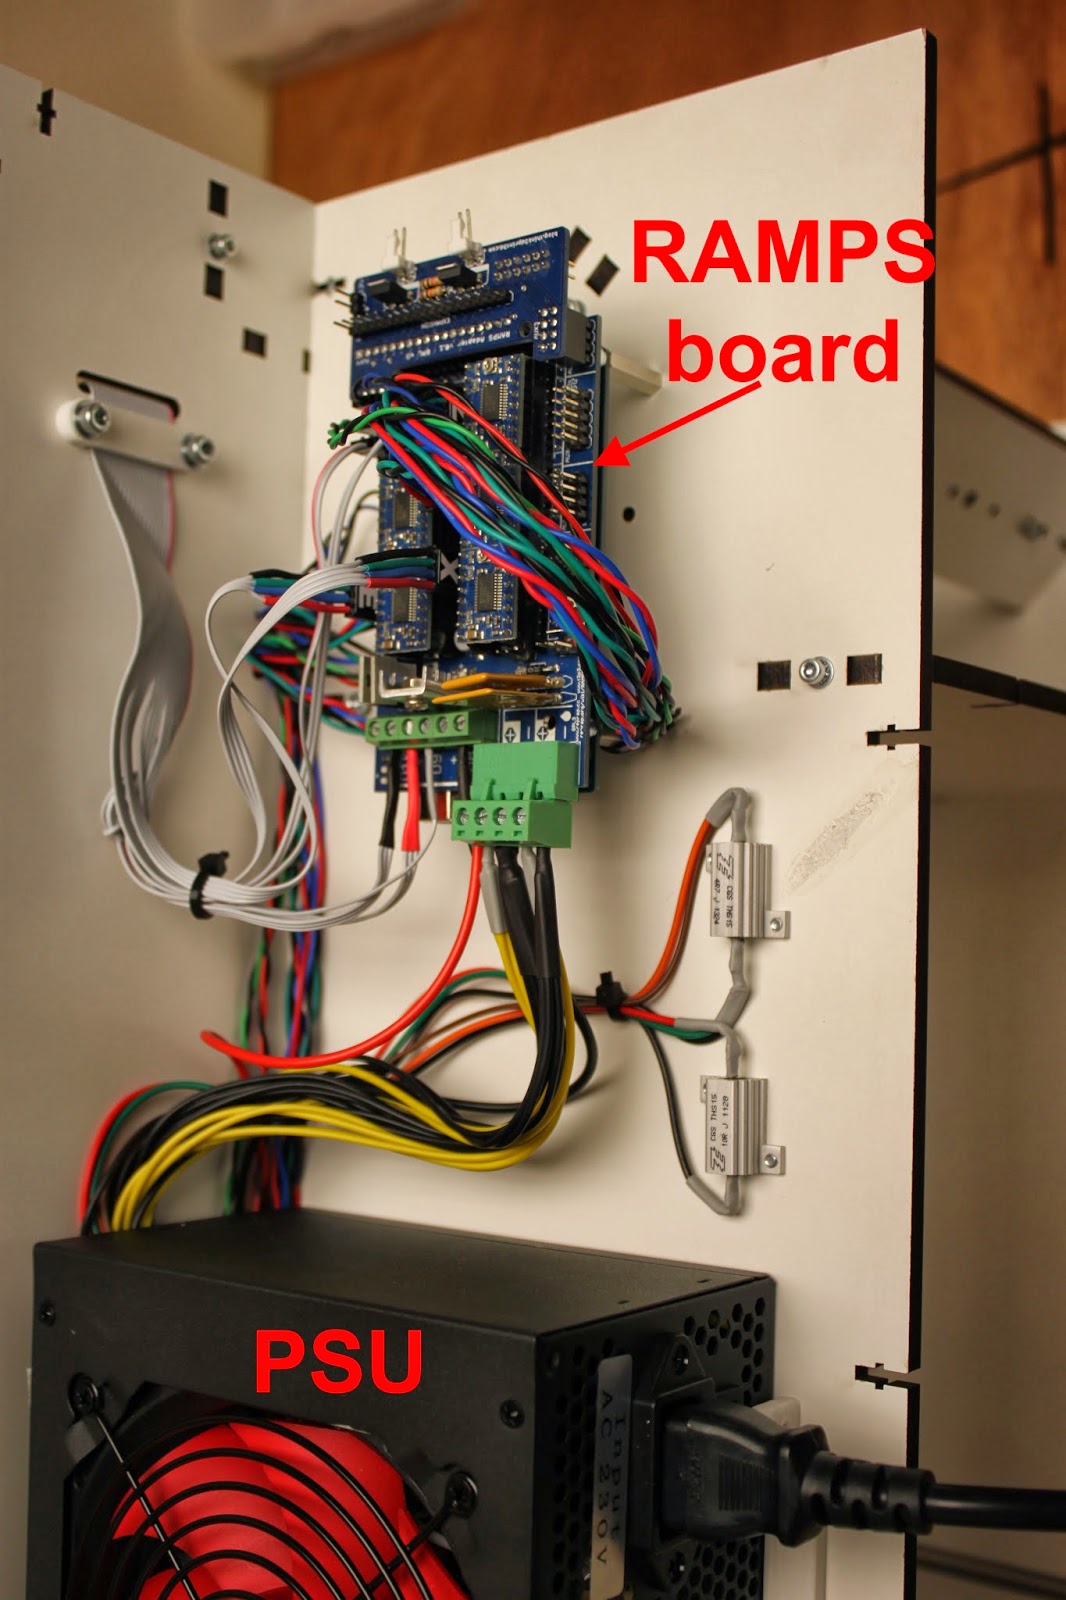
The RAMPS controller board on the printer runs Marlin firmware, which takes the incoming G-code from a connected computer or the SD card on the Panelolu2 and acts on it. In order for Marlin to function correctly it needs to be configured with the information about the printer it is controlling. We supply a version of Marlin with all these configuration changes made and only two parameters need to be tweaked during calibration. For an overview of the basic configuration changes possible, see this blog post.
The Arduino software environment is used to upload the firmware to the board. Firmware is updated once during calibration and then should not need further configuration unless you want to take advantage of new features in future firmware or modify your printer.
Commissioning
Before calibration a number of simple tests are run to ensure everything is hooked up right.
Communication in Pronterface: on connection the following should be displayed:
Connecting..
start
Printer is now online.
Marlin 1.0.0
echo: Last Updated: Oct 8 2013 08:22:09 | Author: (T3P3, M90LC v1.0)
Compiled: Oct 8 2013
echo: Free Memory: 4340 PlannerBufferBytes: 1232
echo:Hardcoded Default Settings Loaded<
echo:Steps per unit:
echo: M92 X80.00 Y80.00 Z4000.00 E520.00
echo:Maximum feedrates (mm/s):
echo: M203 X300.00 Y300.00 Z3.20 E45.00
echo:Maximum Acceleration (mm/s2):
echo: M201 X1000 Y1000 Z10 E45
echo:Acceleration: S=acceleration, T=retract acceleration
echo: M204 S1000.00 T3000.00
echo:Advanced variables: S=Min feedrate (mm/s), T=Min travel feedrate (mm/s), B=minimum segment time (ms), X=maximum XY jerk (mm/s), Z=maximum Z jerk (mm/s), E=maximum E jerk (mm/s)
echo: M205 S0.00 T0.00 B20000 X20.00 Z0.40 E5.00
echo:Home offset (mm):
echo: M206 X0.00 Y0.00 Z0.00
echo:PID settings:
echo: M301 P38.60 I4.55 D81.79
echo:SD init fail
Reading through this list you will see that it tells you what most of your Marlin configuration.h settings are.
The axes are then checked to ensure they trigger the limit switches, move in the right direction when commanded and that the Z axis limit switch is not too high. The extruder and bed are heated up. Once its all confirmed to work as expected the next step is calibration.
Calibration - Step 1
First the X and Y axis are set so that the extruder is the same distance above the print bed at every point. This is made simpler by using 3 point mounting for the bed and by leveling the X axis on the Z rods.

Using a sheet of paper as a feeler gauge, the distance between the extruder and the bed is set to be equal at X min and X max by moving the X-ends up and down the Z rods (blue arrow in the picture above.
Once the X axis is parallel to the bed, the single screw at the front of the printbed is used to move the bed up and down at the front until the bed is level in the Y direction. Once the bed is completely level the Z height is set. This is measured from the extruder at the centre of the bed up to the Z endstop and this number is entered into firmware.
Calibration - Step 2
Next the extruder step (E-steps) setting is checked to confirm it pushes the right amount of filament through. The E-steps are influenced by the filament type, and the hobbed bolt diameter. We set the firmware up for the hobbed bolts and filament we supply so only minor tweaking should be needed.
Using a ruler or calipers a length of filament (30mm to start) is measured off upwards from the top of the extruder. The extruder is then moved in Pronterface by that amount and if there is any difference the extruder steps per mm is recalculated to correct for the difference. The new extruder steps is then entered into the Marlin firmware.
Thats it! - time for a test print:

The fan has been left off up to this point to make calibration easier - it is now time to fit it.
Most people are opting for the acrylic cabinet which can also be fitted at this stage and goes together in a similar fashion to the frame with M3 screws and square nuts. Fitting it does not disturb the printer calibration:


The entire assembly and calibration process is described in more detail in the manual supplied with the printer kits.
I hope that helps to show what goes into the setup and calibration of the printer following assembly.


